How to add an audio player to Wix website
On September 2016 Dropbox announced that they will discontinue the ability to render HTML content in-browser via shared links or Public Folder from October 2016. This tutorial may not work after this change.
Wix is a free website building platform. This tutorial will guide you how to add an audio player created with Amazing Audio Player to your Wix website.
Step 1 – Create an audio player with Amazing Audio Player
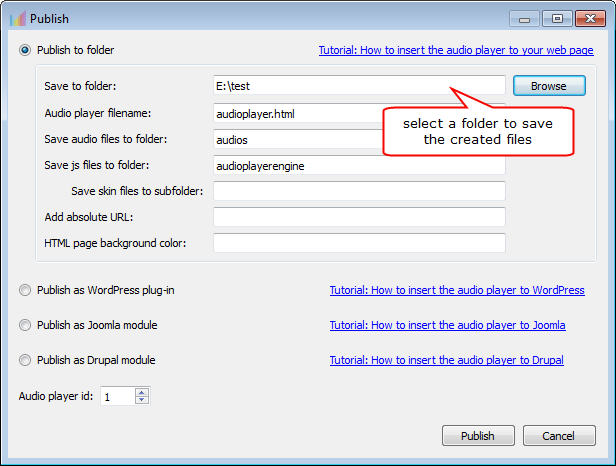
Amazing Audio Player is a wizard-style HTML5 audio player builder. In the application, you can add your mp3 files, select a skin, then click Publish button to create your HTML5 audio player.
Step 2 – Upload the generated audio files to an online web hosting server
Since Wix does not support uploading your own files, you need to upload the generated audio files to other web hosting server.
If you don’t have your own web hosting, you can use the free service provided by Dropbox.
You need to upload all of the player files to the Public folder of your Dropbox account. You can read the tutorial of Dropbox public folder: What is the Dropbox Public folder for?.
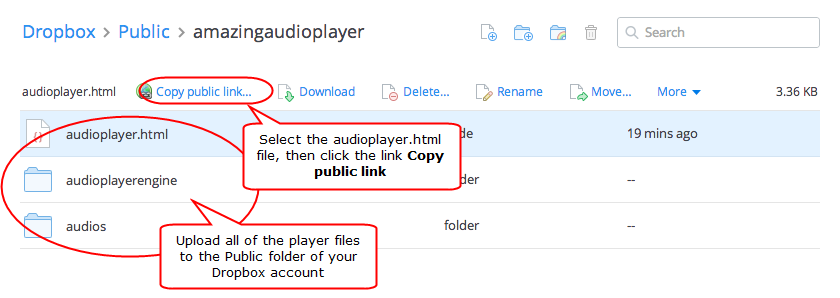
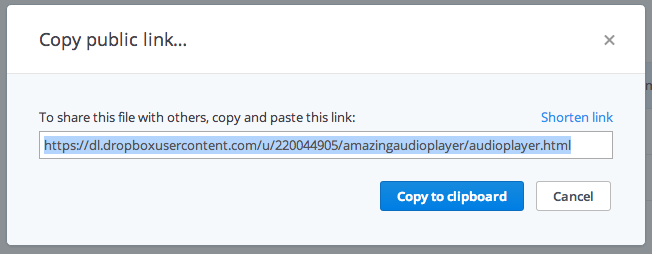
After uploading all of the files to your Dropbox Public folder, click and highlight the audioplayer.html, then click the top link Copy public link. In the popup box, copy and save the link address. We will use the address in next step.
Step 3 – Insert the audio player to your Wix website
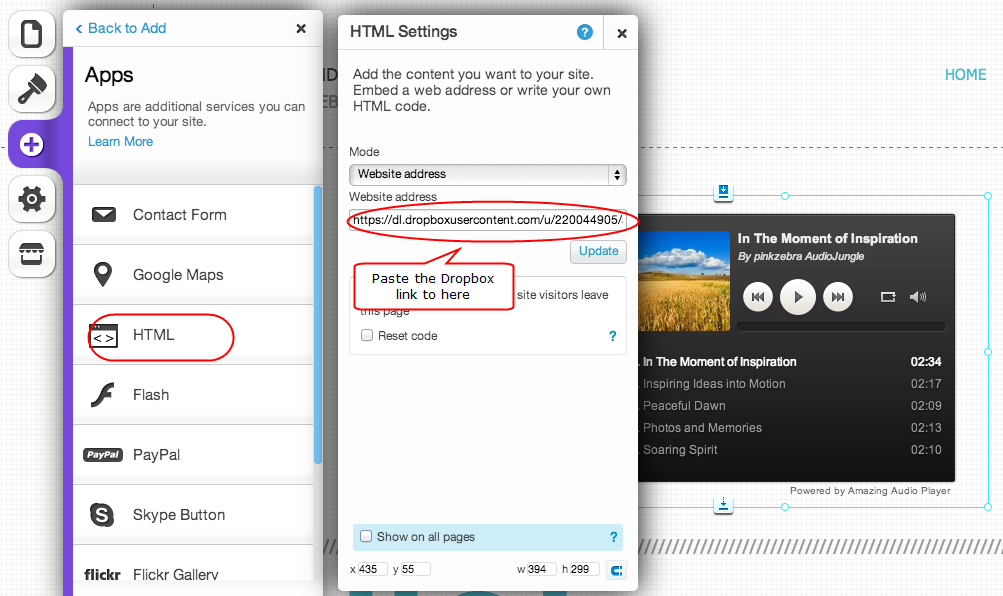
Login the dashboard of your Wix account and goto the website editor. In the left toolbar, click Add, then choose Apps -> HTML. This will add a grey box to the page. Double click the grey box, in the popup box HTML settings, paste the address we got in step 2 to the Website address box.
Click the update button, the player will show up. You can adjust the position and the size of the HTML box using the dots on the sides of the box.
Publish your website, the player is ready to go.