Question:
The WordPress installer will not upload the zip file unless it is under 10 MB in size. I’m using an eight song playlist for a band, which is 20 MB in size. If the playlist is under 10 Mb, I can use the WordPress uploader and things work as expected.
I can unzip the file on my local machine and upload the entire folder manually via FTP into the plugins directory, and it works and installs one playlist, but then I cannot install another second playlist manually. Are there any further instructions for this method? The band has multiple albums.
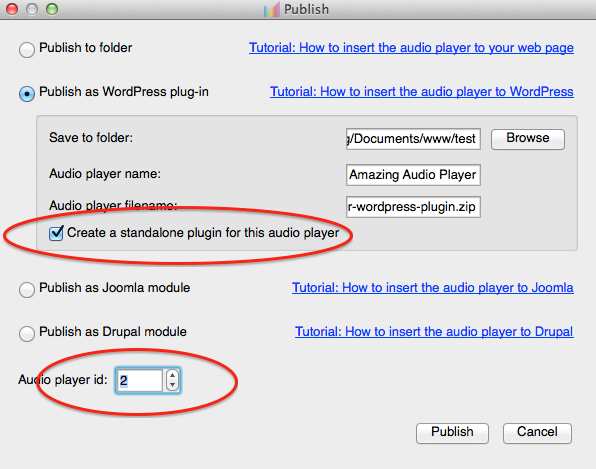
Can you clarify in the publish dialogue for a WordPress player what “create a standalone plugin for this audio player” means?
Answer:
The option “create a standalone plugin for this audio player” will create a standalone plugin for each player.
So you can use it to fix the problem:
1. In the application, choose the option “create a standalone plugin for this audio player”. In the bottom left of the dialog, choose a different “Audio Player id”. You need to choose a different “audio player id” for each player.

2. Create the plugin. Unzip the ZIP file on local machine, the folder should be like “amazingaudioplayer-plugin-X”. The X is the “Audio Player id” you selected for the player. Upload the folder to your WordPress plugins folder.
3. Activate the plugin. It will be a standalone plugin, just for this player.
4. The provided shortcode is different for each player. Please copy the exactly shortcode created by the plugin.
